|
|
🦋 Tin-can Cello: carving the nut
I will not carve the nut until after the glue dries and cures overnight. Instead for now I want to describe the process I'm anticipating that I'll follow.
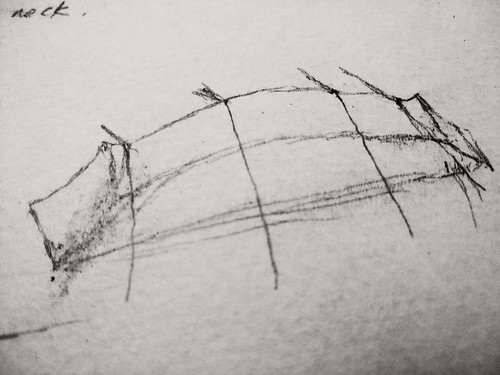
Here is a rough sketch of how the nut needs to be cut away:
steps:

- Locate the points where the C and A strings will cross the nut. There is 23mm distance between the centers of these two strings; center the calipers vis-a-vis the width of the fingerboard. Mark with a knife where the caliper jaws cross the top edge of the nut blank. Pencil in the two verticals.
- Trace the curve of the fingerboard freehand in pencil in between the two verticals. Leave a space of 1.5mm between the surface of the fingerboard and the mark.
- Sketch in the outlines of the two sides of the nut, the horns that you can see in the drawing and the curve down to the end of the nut.
- With a ryoba saw, cut away a kerf for the C and A strings. Use the corresponding peg location as a reference.
- With a small carving chisel/gouge. cut away and shape the arch, terminating at the kerf on either side. Next carve out the horn and bevel, and scoop away the side.
- With chisel, rasp and file shape the angled surface of the arch, using peg locations for reference. The arch needs to support each string without any kinks and guide it toward the peg.
- Smooth everything with sandpaper to 400.
- Locate and cut grooves for the strings.
posted morning of Sunday, October 14th, 2018
➳ More posts about The Tin-can Cello
➳ More posts about Projects
| |
|
Drop me a line! or, sign my Guestbook.
•
Check out Ellen's writing at Patch.com.
| |