|
|
Sunday, September 23rd, 2018
The tools I have found the most useful in the course of building the Tin-can Cello:
- bandsaw. This project would have been just about unthinkable without a bandsaw.
- angle grinder. Has been an invaluable time-saver and has made a fair amount of shaping possible that I would never have started on otherwise.
- dragon rasp. Just a great, great hand tool.
- sanding blocks: Wow. In the course of my woodworking avocation to date, I don't believe I've ever glued sandpaper to wooden blocks. Certainly not the amount I'm doing in this project. It is a wonderful thing!
- scrapers (especially the french curve shape)
posted evening of September 23rd, 2018: 1 response
➳ More posts about The Tin-can Cello
|  |
|
My shop time this weekend has been spent on putting the finishing touches on the neck of the Tin-can Cello. Since I last posted, in parallel with repairing the crack in the scroll, I've been putting stain on the different parts of the neck and buffing it out with steel wool-- I've been able to buff it to a very nice sheen. The pigments are pretty muted, with an antique look.
This weekend I was able to stain the scroll and put some coats of Tru-oil on. I will buff and sand the finish this week, and possibly put one more coat on.
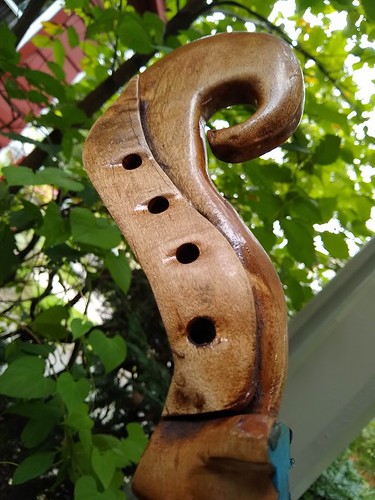
I'm naming him Chelliphant! Finishing steps

- A coat of thinned Tru-oil (about 1 part turpentine, 2 parts finish) over the entire neck, scroll and dowel. (This is the last we will think of the dowel.)
- After about an hour (finish will not be completely dry), buff out with cloth.
- After another hour, wipe with turpentine and buff out with steel wool. (At this point finishing is complete for the upper portion of the neck, which attaches to the fingerboard.) Allow to dry overnight.
- The next day, apply several coats of Tru-oil, allowing about 2 hours between coats. Here we are only finishing the lower, curved part of the neck, the scroll, and the back of the washtub.
- After the fifth or so coat is dry, buff out finish with turpentine and steel wool and cloth.
- After a day or more of drying, sand the finish to 400, 600, 1000 grit and wipe down once more with turpentine.
↻...done
posted afternoon of September 23rd, 2018: Respond
➳ More posts about Projects
|  |
Sunday, September 16th, 2018
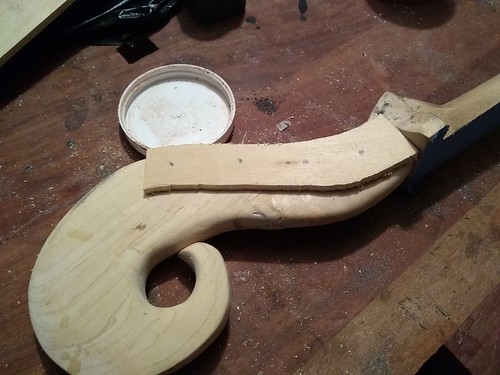
I am planning out a fix for the cracked scroll. My idea is to cut out two ¼" thick maple patches to the pattern I've roughed out above; I will glue them onto the sides of the pegbox and redrill the pegholes as I've marked -- these points are midway between the existing holes. This will significantly strengthen the pegbox and make a better instrument. The trick is going to be getting the mating surfaces perfectly flat.
posted afternoon of September 16th, 2018: 1 response
|  |
|
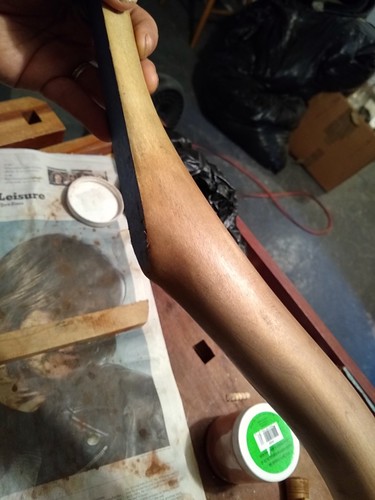
I've started the process of coloring the cello's neck. Holding off on the scroll until the repair is finished...
I'm taken aback by what a shiny, smooth "finished" surface I can get by buffing out the stain. The stain I'm using is made by mixing tea and pigment dissolved in turpentine -- apply by rubbing on with a cloth, then rubbing off the excess. Before it has fully dried, buff with steel wool. After it has dried, sand with 400 grit, and buff again with steel wool and cloth.
The curved part of the neck has varying depth of color; during the staining process I noticed scratches in a couple of places that I had missed when sanding the neck, and went back and sanded them out, removing stain. (There are also scratches that I left.) It looks surprisingly ok... I am thinking the finish will be a coat of thinned Tru-oil and then a coat of un-thinned Tru-oil, and maybe further coats for the lower portion of the neck and the scroll. Buffing with steel wool and cloth.
posted morning of September 16th, 2018: Respond
|  |
Wednesday, September 12th, 2018
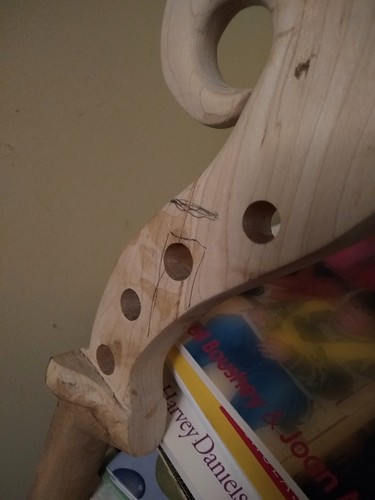
I dropped the cello neck as I was staining it, and cracked the scroll. To fix it I've glued the two pieces together with clear Gorilla Glue; now I'll need to first, glue a hardwood dowel through the joint on the upper side of the peghole, and then cut out the peghole in the direction of the grain. I'll glue a new block of wood in that void, reinforce with a dowel, and redrill the hole.
posted evening of September 12th, 2018: 2 responses
|  |
Saturday, September 8th, 2018
8/4 hard maple board, 7" x 7 feet. $50
11-gallon Behrens washtub. $30
fingerboard and nut. (free as salvage)
bridge. $50
tailpiece. $50
tailcord. $10
pegs. $40
drumhead. $40
plywood for back. (free as scrap)
strings. $7 (ebay)
bow. $60
I'm waiting on the tailcord as I said below, and have yet to buy the strings. I'm planning to use the bow from my dilruba, at least to start with. [Note I ended up buying a cello bow from Menzel, for $60. Dilruba bow is haired with black horsehair, which is not appropriate for a cello.] I think I overpaid for the bridge and tailpiece, but I don't mind since I got the salvage cello in the deal. Update Tuesday the 11th: Tailcord arrived... I'm champing at the bit to start finishing! ...The varnish is supposed to be arriving today, as is the drying lamp. Sealer coat tonight? Update Monday the 24th: Got my strings...
posted afternoon of September 8th, 2018: Respond
|
|
I sent away for a book of duets by Bach for (Stroh!) violin and (Tin-can!) cello... Guess that's gonna mean taking lessons at some point...
posted afternoon of September 8th, 2018: Respond
| |
|
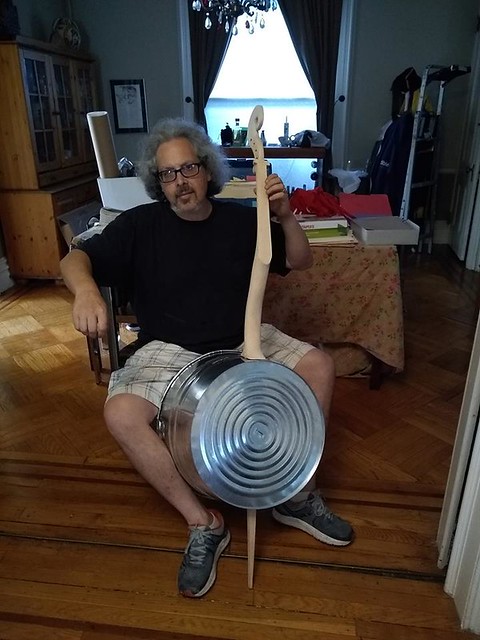
My tin-can cello is becoming a real thing... three major things left to do are
- Finish the neck and scroll: I will disassemble it for this; waiting on delivery of a bottle of varnish and of a UV lamp to help the varnish dry. (I'm going to leave it with the neck and body put together and the various braces in place for the time being, and just go downstairs every couple of hours to crow over it :), until the varnish arrives.)
- glue up the fingerboard and nut. This will need to wait until the process of finishing is complete.
- set up the backing skin for the body. I'm waiting on delivery of a 20" bass drumhead, and need to buy some steel braces that I will bend to shape. (Or wait, no, maybe I will cut supports for the drumhead out of maple.) Update, the drumhead idea is a mistake. I will cut a back out of ¼" plywood.
And then I can start on the setup! (Oh one other thing I'm waiting on delivery of, is a tailcord. And I have not purchased any strings yet.) Setup entails:
- Putting the tailpiece on.
- Carving the feet of the bridge.
- Putting on A and C strings.
- Calculating height of bridge. (Leave ⅛" to account for deflection of the soundboard!)
- Carving top of bridge.
- Putting on all four strings to check tension, height, and spread of bridge feet; correcting if necessary. Adjusting slots in nut.
- Carving bridge in thickness and chamfer.
- Final stringing.
- First playing!
I am hoping to broadcast live video of the final stringing and first notes of the instrument! Fingers crossed!
↻...done
posted afternoon of September 8th, 2018: Respond
|  |
Tuesday, September 4th, 2018
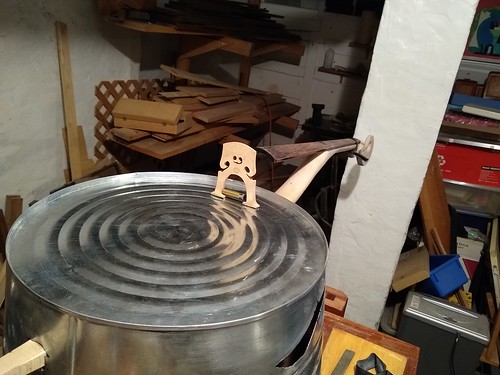
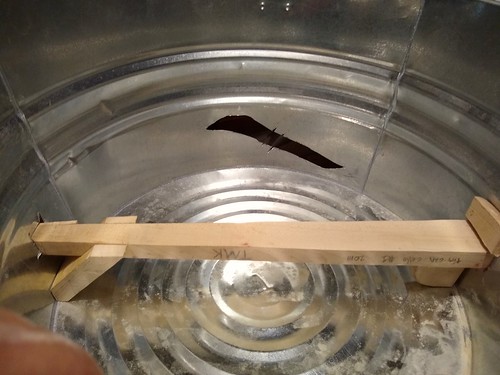
Two milestones this weekend in work on the Tin-can Cello: one quite visible, one hidden. Getting the neck into the bucket, and having it fit and look like what I was expecting, obviously huge; and figuring out how to brace the body is huge, and makes it way more likely that this will end up a playable instrument.
posted afternoon of September 4th, 2018: Respond
|  |
Monday, September third, 2018
Somehow I've had in mind for a while that I would rub pigment dissolved in turpentine on the cello neck to color it, and then finish over that with varnish. But now that I think about it it would be better to use the varnish as a base and add the dissolved pigment to the varnish.
My plan is to put a coat of clear varnish over the whole neck and scroll, and let that dry for a few days, then sand to 600 grit, and do a second coat with colors-- adding pigment as I move down the neck and to the scroll. After that dries, I will sand again and do a third coat, either with or without pigment. Maybe a fourth, clear? I will see how it looks after the third coat and sanding.
posted afternoon of September third, 2018: 2 responses
| Previous posts
Archives  | | |
|
Drop me a line! or, sign my Guestbook.
•
Check out Ellen's writing at Patch.com.
| |