|
|
Wednesday, October 17th, 2018
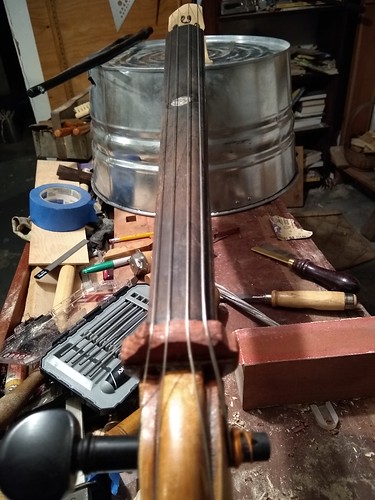
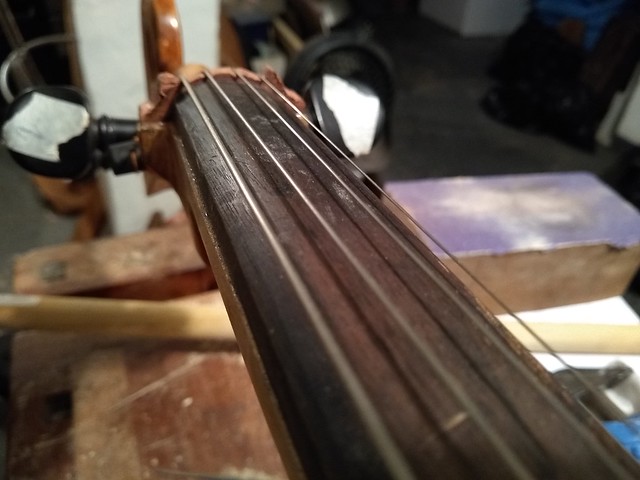
I've got strings on my tin-can cello! It's nearly an instrument. Remaining steps:
- Finalize the grooves in the nut: I'll do this one string at a time -- mark the groove, take the string off, file the groove out, put the string back on. This will also be an opportunity to put peg dope on the pegs.
- Bring the strings up to pitch and finalize the string heights at the bridge.
- Finish carving the bridge in relief and chamfer.
Pretty sure that's it. At this point, I can play an open string and hear it ring. Sounds nice!
 Update -- I have done more work on the nut and bridge. At this point I can play the instrument and finger notes. I think the strings are too high (except for the A string, which might be too low), going to check with Mo Menzel for setup advice. I hope I did not take too much material off the treble side of the bridge.
posted evening of October 17th, 2018: Respond
➳ More posts about The Tin-can Cello
|  |
Sunday, October 14th, 2018
Mike pointed out to me an issue with the design of the tin-can cello, one which had previously been called out on a Maestronet thread -- the bridge is in contact with the soundboard near the outside of its radius rather than near the center, which is more resonant. The tone will be bright and lacking in bass, which is pretty key to a cello's tone...
So, well, ideas for a future tin-can cello variation I guess. I'm pretty committed to having the bridge near the top of the soundboard, based on the length and angle of the neck; a big change would mean starting pretty much from scratch. In addition, there's a mechanical reason for keeping the bridge high: the bow stroke needs to be clear of the washtub.
 Update: After setting up, the tone seems to be just fine, plenty of bass.
posted afternoon of October 14th, 2018: Respond
➳ More posts about Projects
|  |
|
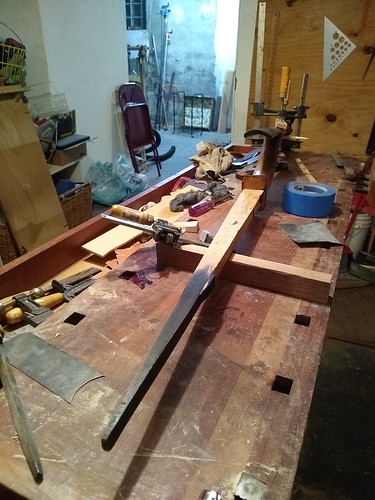
I will not carve the nut until after the glue dries and cures overnight. Instead for now I want to describe the process I'm anticipating that I'll follow.
Here is a rough sketch of how the nut needs to be cut away:
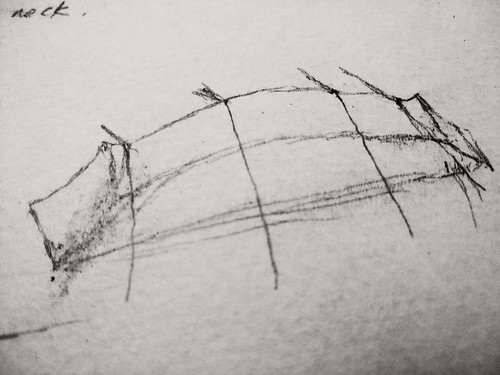
steps:

- Locate the points where the C and A strings will cross the nut. There is 23mm distance between the centers of these two strings; center the calipers vis-a-vis the width of the fingerboard. Mark with a knife where the caliper jaws cross the top edge of the nut blank. Pencil in the two verticals.
- Trace the curve of the fingerboard freehand in pencil in between the two verticals. Leave a space of 1.5mm between the surface of the fingerboard and the mark.
- Sketch in the outlines of the two sides of the nut, the horns that you can see in the drawing and the curve down to the end of the nut.
- With a ryoba saw, cut away a kerf for the C and A strings. Use the corresponding peg location as a reference.
- With a small carving chisel/gouge. cut away and shape the arch, terminating at the kerf on either side. Next carve out the horn and bevel, and scoop away the side.
- With chisel, rasp and file shape the angled surface of the arch, using peg locations for reference. The arch needs to support each string without any kinks and guide it toward the peg.
- Smooth everything with sandpaper to 400.
- Locate and cut grooves for the strings.
↻...done
posted morning of October 14th, 2018: Respond
| |
|
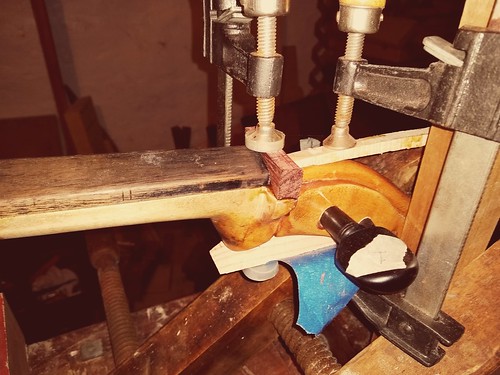
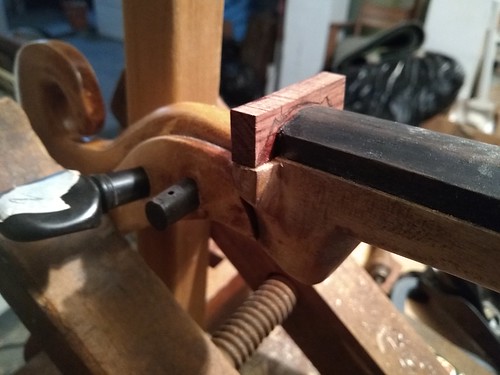
So I'm pretty impatient, which is not a particularly good quality when it comes to woodworking; even less so when it comes to luthery. (Well ntm, just in general.) Most every wood project I've ever worked on has had issues in the glue-up. Well now I'm using hide glue rather than wood glue, which means I get a second chance!
After a couple of abortive attempts yesterday I got the nut glued in place; but when I looked at it this morning I saw that the way I had clamped it had not held it in place abutting the fingerboard, and there was a gap. Since the glue is hide glue, it was pretty quick work to break the joint apart. Now it is glued up and clamped in place again, with a brace holding it tight against the fingerboard... I'm impatient to start shaping the nut but first I have to get the blank glued in place properly.
posted morning of October 14th, 2018: 2 responses
|  |
Friday, October 12th, 2018

posted evening of October 12th, 2018: Respond
➳ More posts about Wallpaper
|  |
|
Mike came over this evening and helped me with starting setup of my tin-can cello. But it quickly became apparent that the nut that's on the cello now (taken from the same salvage cello that the fingerboard came from) is not going to work. The action is too low, for one thing, and it turns out my lateral peg-box is going to require a special shape of nut, to keep the C string in place. I am going to carve it out of a block of cocobolo (which is what I have on hand, I think it will work in place of ebony), taking the tutorial Making a Violin Nut, by Matthew Noykos, as my point of departure.
posted evening of October 12th, 2018: Respond
| |
Tuesday, October 9th, 2018
A FB friend hits the nail on the head: How quickly we went from “I Believe Christine Blasey Ford†to “Will This Help Or Hurt Us in the Midterms?â€!
posted evening of October 9th, 2018: Respond
|  |
Thursday, September 27th, 2018
So I'm going over to Derek's shop on Sunday, to see if I can use his fifth-string peghole taper on my cello... If not I'll bite the bullet and buy a taper from StewMac -- I have a hunch that it will not, and I'll have to. (Update, bought a taper from eBay. Setup is not going to happen for another 3 to 6 weeks.) I made a couple of minor tweaks to the body this evening, bolting on a block that was loose and fixing the forward brace in place with a screw, and I closed the back. I put thick masking tape on the bucket where the tail spike emerges, to mask any rough edges that might wear at the tailcord.
posted evening of September 27th, 2018: Respond
| |
Wednesday, September 26th, 2018
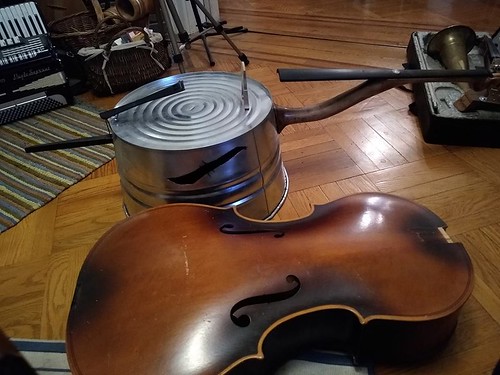
It is a nice confirmation to get: this evening I thought to lay the tin-can cello next to the body of the Kay cello which I scavenged its fingerboard and neck measurements from -- the bottom and top of the cello body line up exactly with the bottom of the washtub and the end of the curved portion of the neck, and the bridge position on the tub lines up with the center of the f-holes on the cello. What's nice is that I did not use this cello body for measurements or as a story stick, I calculated all the scale numbers based on the washtub dimensions. But I went into this (before I had started working out dimensions at all) with the image of the washtub as the lower ⅝ or so of a cello's body, the curved portion of the neck making up the upper part of the body -- it looks like that's right on.
Also -- confirmed that the D string (which winds on the fourth peg, furthest distance from the base) will reach from the tailpiece to the peg.
posted evening of September 26th, 2018: Respond
| |
Monday, September 24th, 2018
I glued the fingerboard onto the cello neck this evening, which has a feeling of finality to it -- really all that's left now is to put the strings on!

posted evening of September 24th, 2018: Respond
| Previous posts
Archives  | |
|
Drop me a line! or, sign my Guestbook.
•
Check out Ellen's writing at Patch.com.
| |